My Invitations
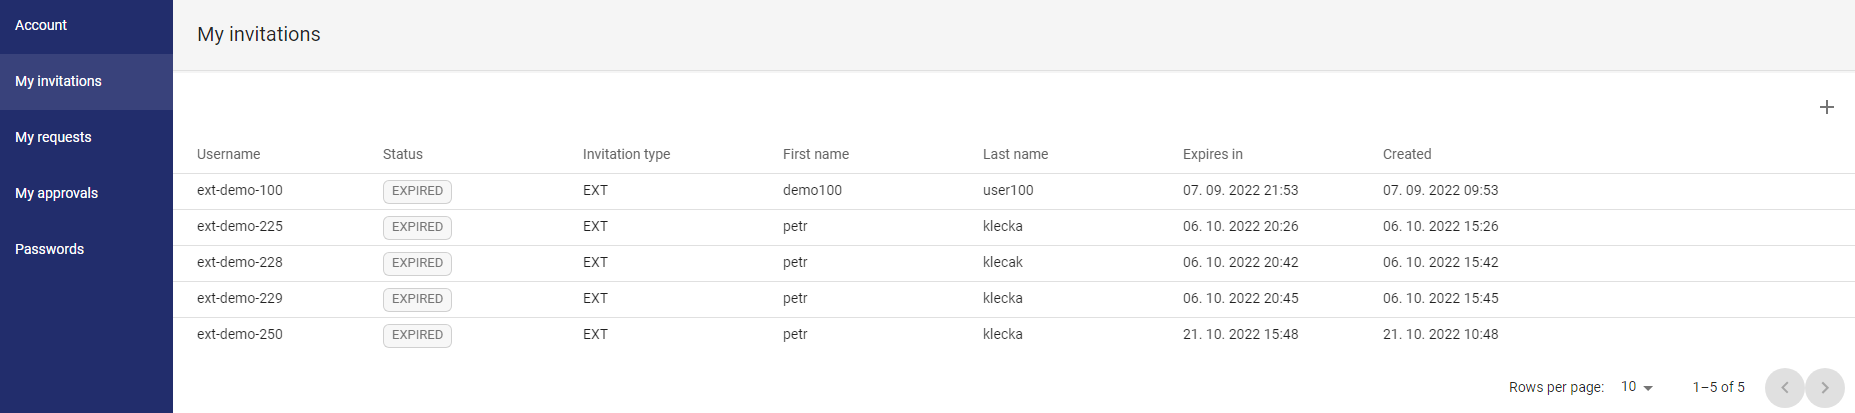
the My invitations page contains a list of recruitment invitations that have been sent. The Invite new user feature allows a user with specific permissions to invite a selected user to the ANT ID system under the same tenant. The invitation is a two-step process, in the first step it is necessary to fill in the data for creating a user identity in LDAP (or any other resource) and in the second step the user is sent an invitation with instructions on how to start the registration process. The invite options are configured at the administrator level.
Available actions for user with appropriate privileges:

Function for inviting new user for current tenant - starts the sponsored invitation process
Delete invitation

Delete invitation - only available for invitations in state SENT or IN_APPROVAL- function accessible in the context menu of the invitation[  ].
].
Send invitation

Send invitation email to invitee - function accessible in the context menu of the invitation [ ].

Resend a previously sent invitation - function accessible in the context menu of the invitation [ ].
[ click on the row ]
Display the page with all details of the specific invitation.
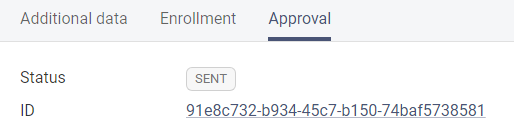
Status of the invitation:
IN APPROVAL

Invitations that meet the conditions for inclusion in the approval process (the approval process is defined at the level of the application administrator).
SENT

Invitations that have been sent to the user's chosen email address - these invitations are expected to be active on the part of the invitees, who can start the ANT ID registration process at any time.
EXPIRED

Invitations that have expired. Users invited on the basis of these invitations can no longer log into the ANT ID system.
Invite new user
1
Open the My invitations option in the Selfservice menu
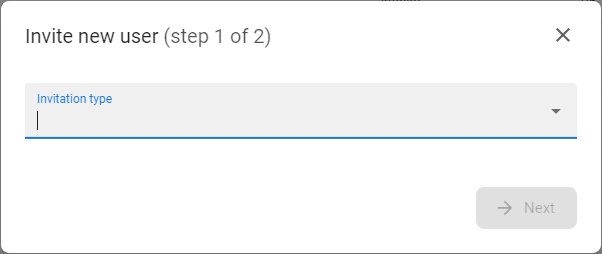
2
Press the INVITE NEW USER button
3
The window for selection of invitation template will be displayed
4
Choose the template and press the button NEXT
5
The form for the invitation detail will be displayed.
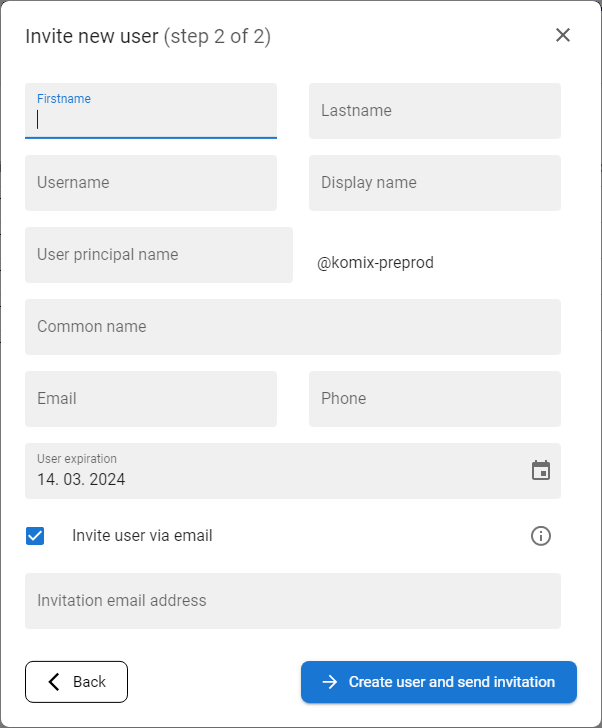
6
Fill the form and press button CREATE USER AND SEND INVITATION
7
The user will be created in LDAP and invitation email will be send to inserted email address.
8
At this moment the onboarding process is started and user can use link from the email to start enrollment to the application.
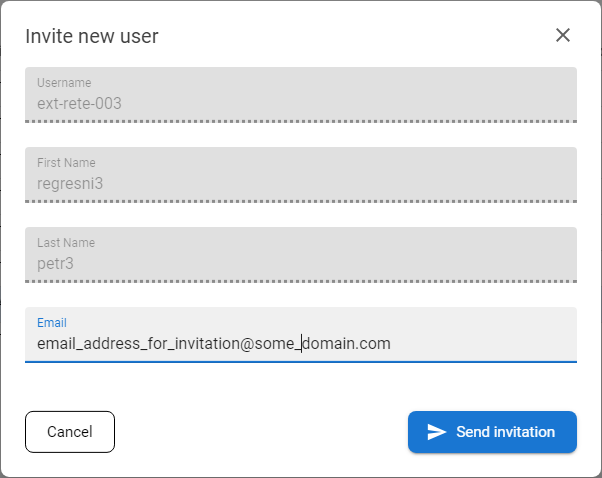
The meaning of invitation form fields:
Firstname
First name of the invited user
Lastname
Last name of the invited user
Username
Username of the invited user - mostly predefined by the company policies
Display name
Display name of the invited user - mostly the combination of first name and last name
User principal name (UPN)
LDAP attribute for the invited user identification - could be prefilled as a username or combination of first name and last name - should be predefined by company policies
Common name (CN)
LDAP attribute for the invited user identification - could be prefilled as a username or combination of first name and last name - should be predefined by company policies
email address of the invited user
Phone
mobile phone number of the invited user
Invite user via email
if the checkbox is checked, then the user will receive the invitation email right after the user identity is created in predefined LDAP (resource AD)
Invitation email address
email address where the invitation email will be send
Resend invitation
1
Open the My invitations option in the Selfservice menu
2
Press RESEND INVITATION [ ] button from the context menu of desired invitation
3
The confirmation modal window will be opened to confirm.
4
Confirm the email address (or change it if needed) and press SEND INVITATION button.
Display invitation
1
Open the My invitations option in the Selfservice menu

2
Click on the row of desired invitation to display the drawer with the details
3
The drawer contains following details:
Header:
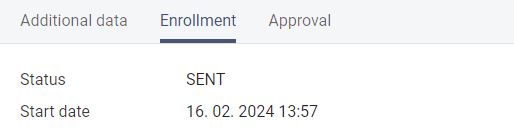
Additional data tab:
Enrollment tab:
Approval tab: